The Issue: A sketch that previously compiled now fails with this error:
fatal error: rom/miniz.h: No such file or directory
Cause: This happened after updating the ESP32 board package (used for M5Stack devices) to version 3.2.0. It only seems to affect sketches that use the M5Core2 library (not M5Unified).
Solution (as of now):
Downgrade the M5Stack board package from v3.2.0 to v2.1.4 using the Boards Manager in the Arduino IDE.
Go to Tools \ Board: “xxxxx” \ Boards Manager…
Search for M5Stack
Remove version 3.2.0
Install version 2.1.4
Recompile the sketch
Note: This is a temporary workaround. M5Stack may address this issue in a future release. If you encounter this error again, first check for an updated board package before downgrading.
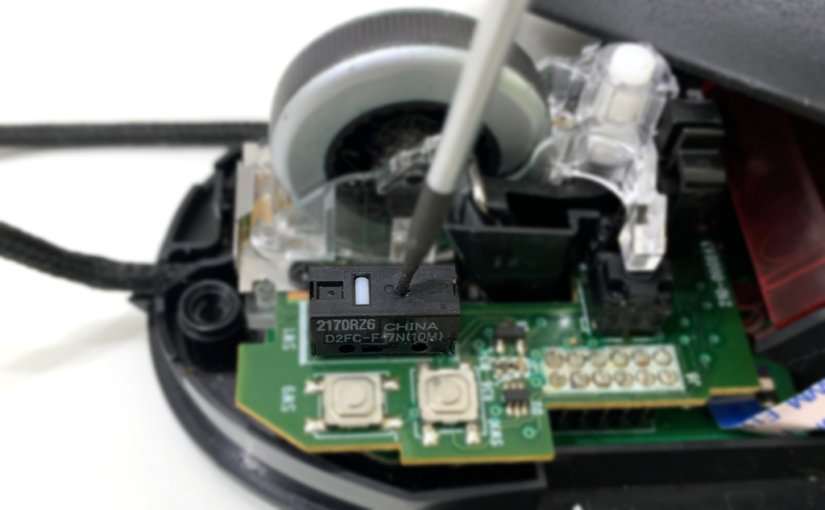
When my ancient Logitech G500 mouse stopped working properly, I followed these helpful instructions to bring it back to life. Now I know more than I ever wanted to know about the mechanics inside the Omron D2FC-F-7N microswitch.
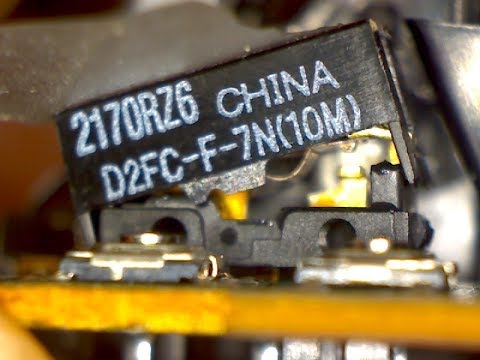
Here’s a short video I made showing how it should work:
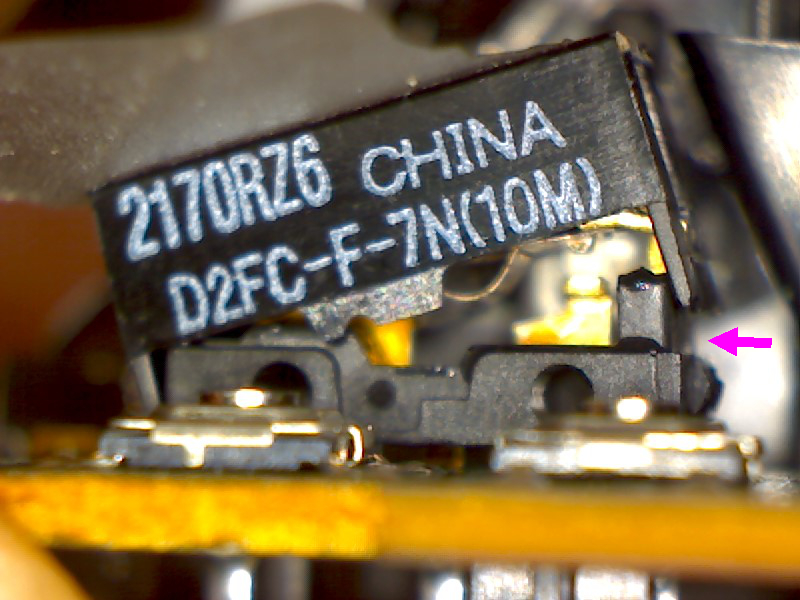
Inside the Omron D2FC-F-7N Microswitch
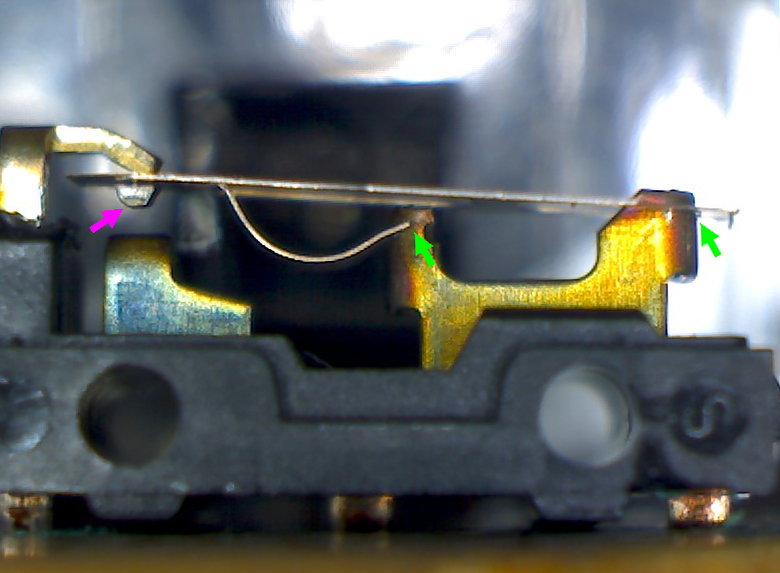
“10M” stands for 10 million operations. There’s apparently also a 20M version.
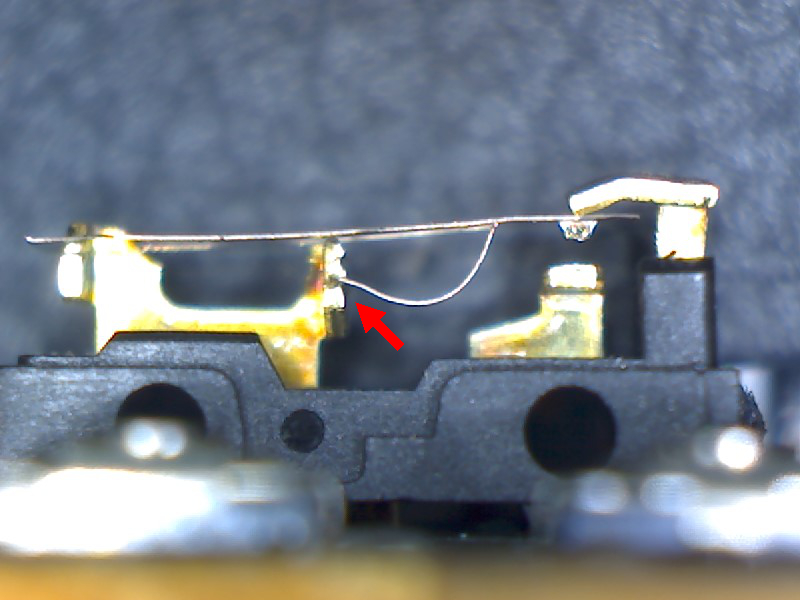
This is a photo of a working switch:
The purple arrow points at the contact area that may require cleaning (opposite side as well). You do not necessarily have to remove the leaf spring to do this (I recommend leaving it in place). The green arrows point at the notches mentioned in the article linked above.
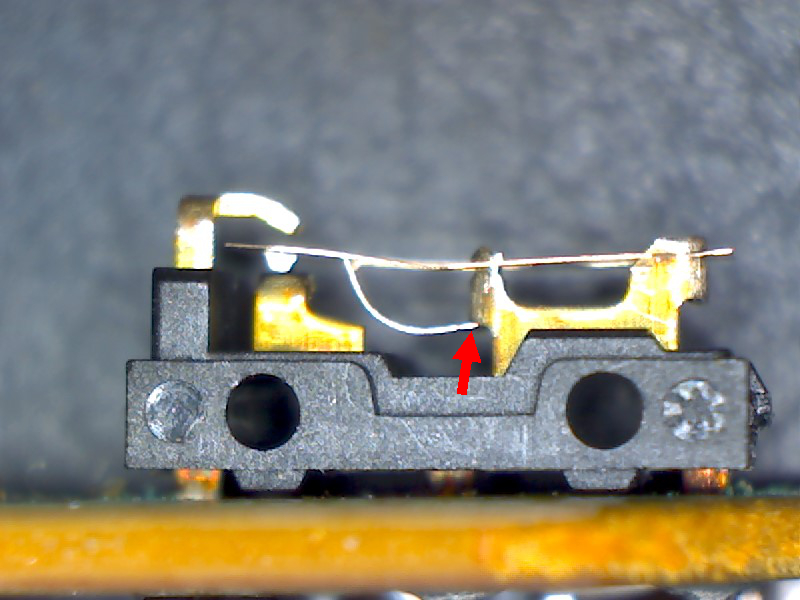
The following switches will not work as the leaf spring is not positioned correctly in one of the notches:
This one is particularly tricky as it is impossible to see the problem with the naked eye (it looks fine but should be in the notch above).
I recommend opening the switch from this side (compare label on your switch for orientation):
Just like me, you will most likely bend and dislocate the spring if you open the switch from the other end.
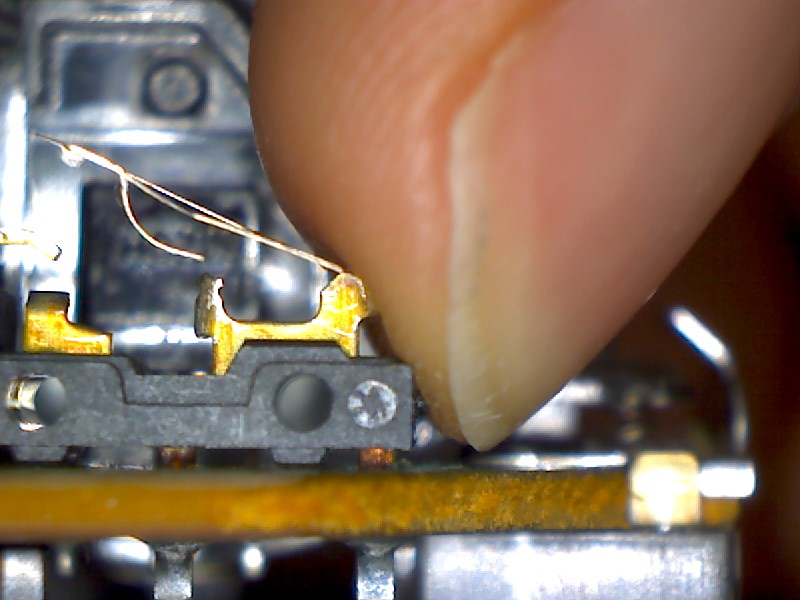
Finally, a photo with my finger shows why these are called microswitches (actually Omron uses the term “Ultra Sub Miniature Basic Switch”):
If you don’t like working with tiny parts you might be better off getting a new mouse.
Disclaimer: If your mouse has been in use for several years, you should seriously consider buying a replacement switch. I believe you could desolder the switch from the top by cutting it into pieces first (the plastic is rather soft). Replacements don’t seem to be available from electronic components distributors but are sold on Amazon.com (affiliate link).
I was only able to repair my mouse because I had another broken one from which I stole a leaf spring (from the less-used right switch). The original spring of the left switch in my mouse was badly deformed. Unfortunately I can’t show you any pictures because it flew away when I tried to bend it.
Build a protocol converter. Most scales use proprietary protocols, but you can convert the data to MQTT or other protocols as shown here. Do not say that you have developed a protocol converter, call it an IoT gateway to get more attention.
Use speech synthesis to output the weight as spoken words for visually impaired users.
Use speech recognition to send commands to the scale (e.g. the tare command).
Install a Pi Camera Module and take a picture of the user every time the scale is overloaded.
Turn the scale into a checkweigher by comparing the weight with preset values and making under/accept/over LEDs light up.
Transform the weight into a proportional analog signal (voltage) because… I have no idea! Why do people keep asking for weighing scales with an analog output? Seriously, if you know the answer, please tell me.
Trigger an alarm or something worse when an object is removed from the scale:
Raiders of the Lost Ark IMAX Movie CLIP - Throw Me the Idol (2012) - Harrison Ford Movie