Window shadows are much larger under Windows 11 than under Windows 10. This can be an issue if you need to take screenshots, but don’t want to waste so much space on shadows. Simply cropping the screenshots is not a very aesthetically pleasing solution.
Solution 1: Use Alt+PrintSc
To quickly capture a screenshot of your active window without the shadows, press and hold the ‘Alt’ key, then hit the ‘PrtScr’ (or ‘PrtSc’) key. This will immediately capture a shadow-free screenshot of the window and copy it to your clipboard.
Solution 2: Temporarily disable shadows under windows
The simple solution above does not work for more complex scenarios, such as multiple windows in a single screenshot, or when you want to include tooltips.
For these cases, you can disable shadows under windows temporarily.
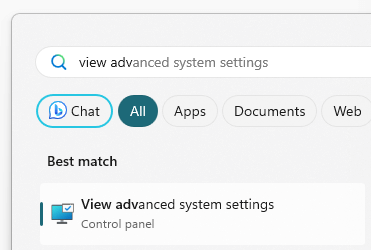
In the start menu, start typing “view advanced system settings” and then click on the best match:
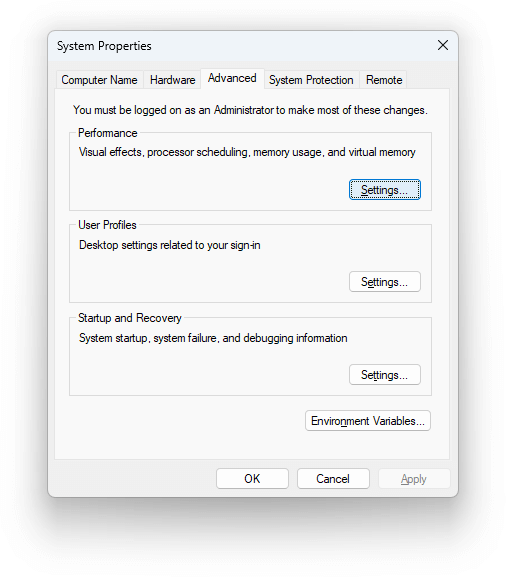
Click on Settings under Performance (in the Advanced tab):
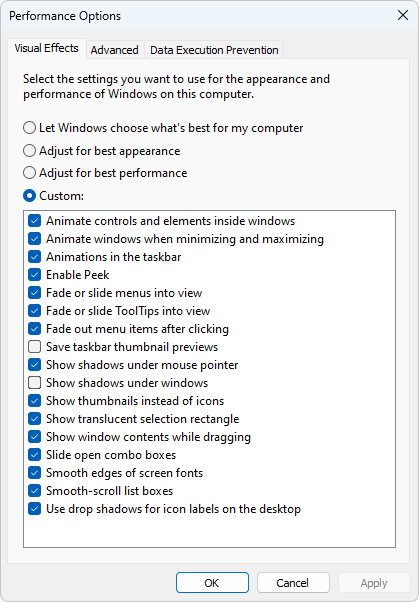
Uncheck “show shadows under windows”.
If you’re looking to disable shadows for a brief period, click Apply. This will disable the shadows but keep the dialog box open for you to easily revert to the original settings:
If you want to keep the shadows disabled for a longer time, click OK.
You can now use PrintSc or Windows+Shift+S to capture a screenshot.
Some programs still save their settings in the Windows registry. The instructions below will let you copy a part of the registry to another machine.
Important: Modifying the registry can have unintended consequences and may cause issues with your system. Always make sure to create a backup of your registry and a system restore point before making any changes.
On the source machine:
Press Win + R to open the Run dialog.
Type regedit and press Enter to open the Registry Editor. If prompted by User Account Control, click “Yes” to proceed.
In the Registry Editor, navigate to the registry key you want to copy. For example, if you want to copy a key related to a specific software, it might be located under HKEY_CURRENT_USER\Software\ or HKEY_LOCAL_MACHINE\SOFTWARE\.
Right-click on the registry key you want to export (in the left panel) and select “Export.”
Choose a location to save the .reg file, give it a name, and click “Save.”
Transfer the .reg file to the destination machine using a USB drive, cloud storage, or any other preferred method.
On the destination machine:
Locate the .reg file you transferred from the source machine.
Double-click the .reg file to start the import process. If prompted by User Account Control, click “Yes” to proceed.
A warning message will appear, informing you that making changes to the registry can cause system instability. If you’re sure you want to proceed, click “Yes.”
A confirmation message will appear once the registry key has been successfully imported. Click “OK” to close the message.
Now, the desired part of the registry has been copied from the source machine to the destination machine.
Note: If any of the registry values include file paths, you might need to adjust these paths to match the file structure on your new system.
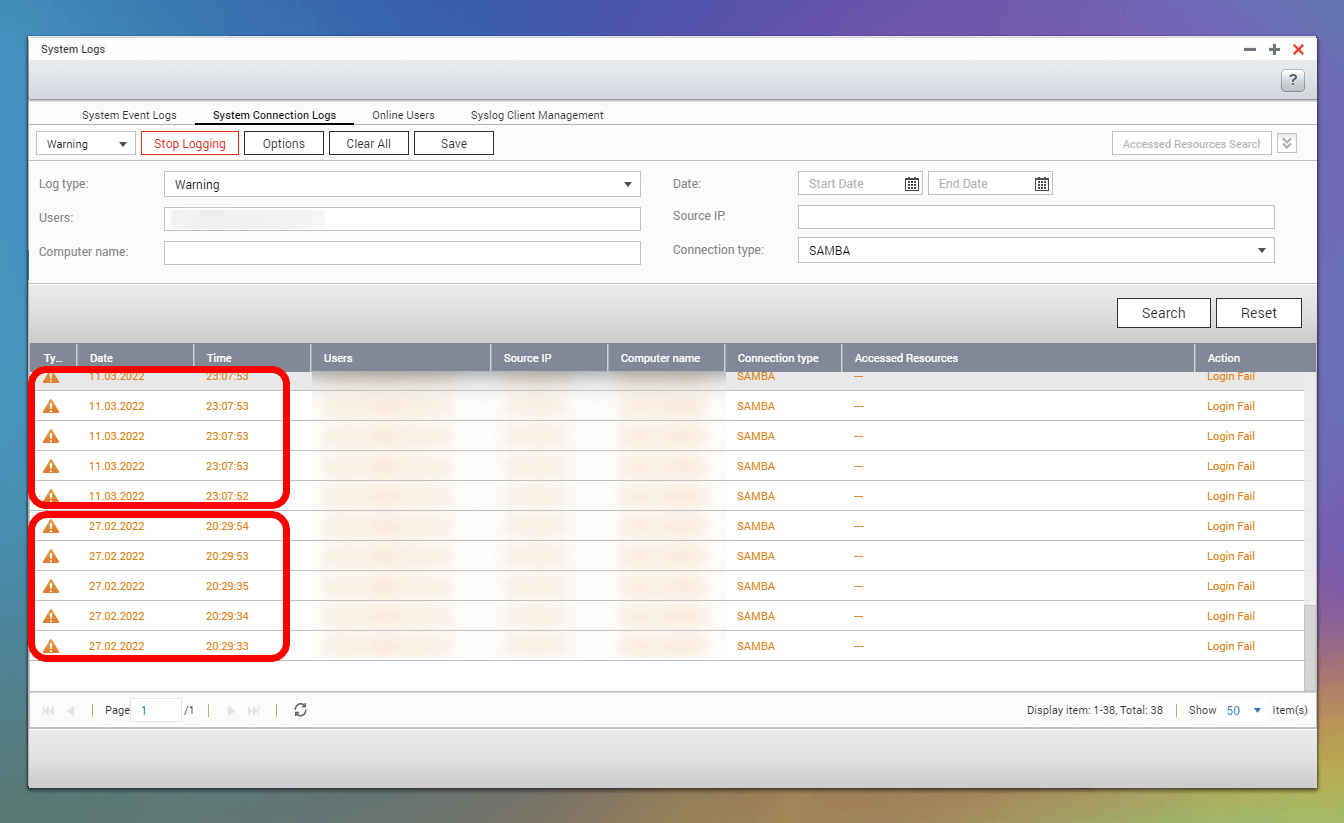
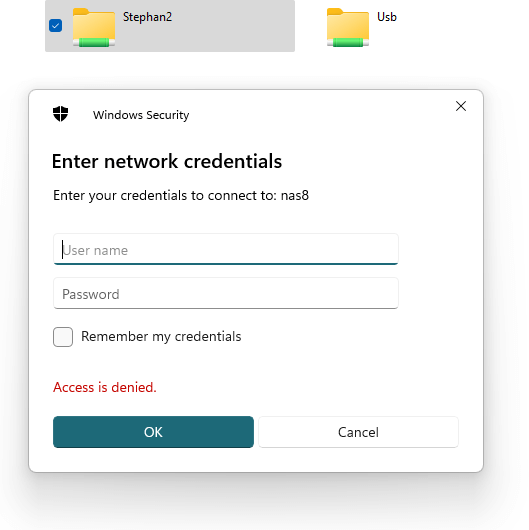
The problem: You cannot access the SAMBA (SMB) shares on your QNAP NAS from the Windows File Explorer and after you tried, access to the web interface also stopped working. The NAS is still accessible from other PCs on the same network.
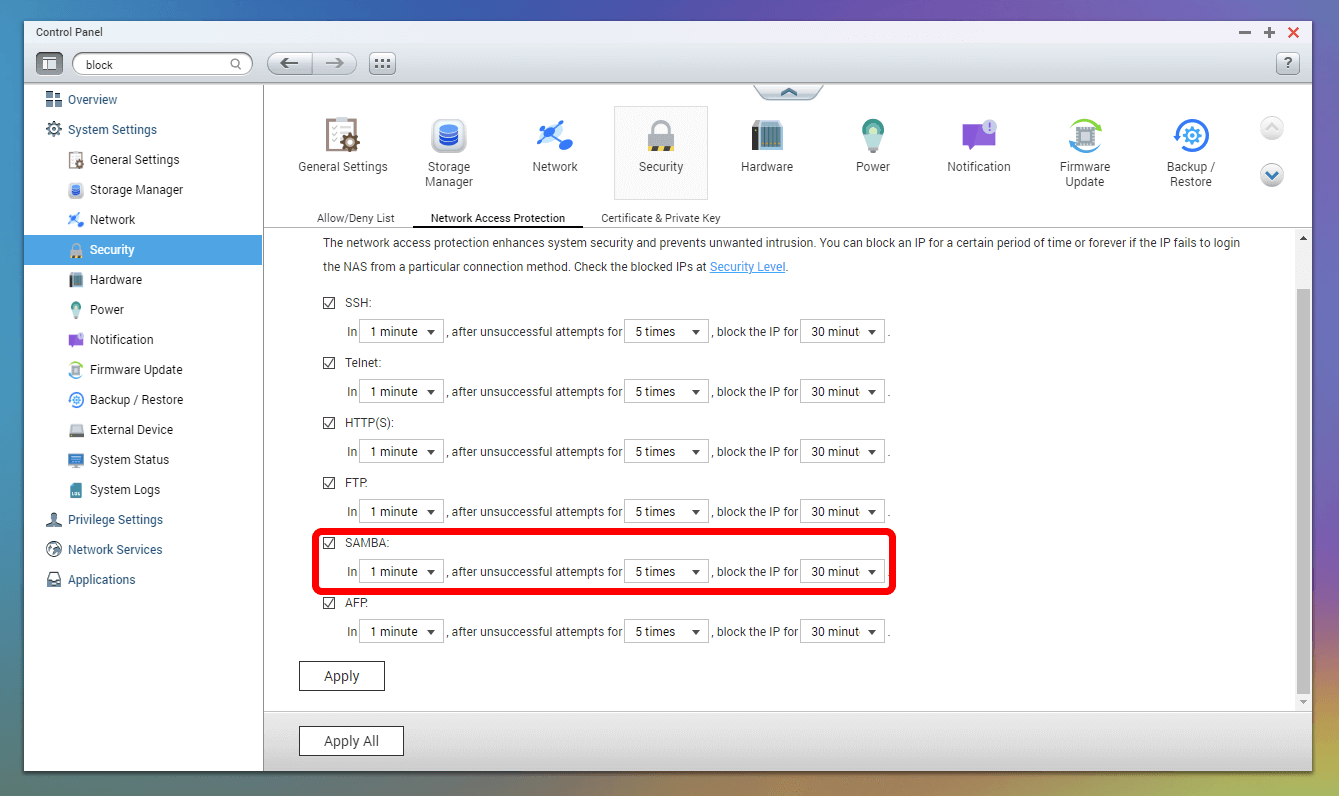
The reason: Windows will first try to connect to your NAS using your Windows login credentials. If this fails too many times and Network Access Protection on your NAS is enabled, your PC’s IP address will be banned:
You can see the failed login attempts in the System Connection Logs (if enabled for SAMBA):
Solutions
There are many threads about this issue on the QNAP forum proposing various solutions, such as:
Creating a user account on the NAS with the same user name and password as on Windows.
Disabling Network Access Protection on the NAS.
Making all folders public.
Disabling all guest shares on the NAS to force Windows to show the network credentials dialog.
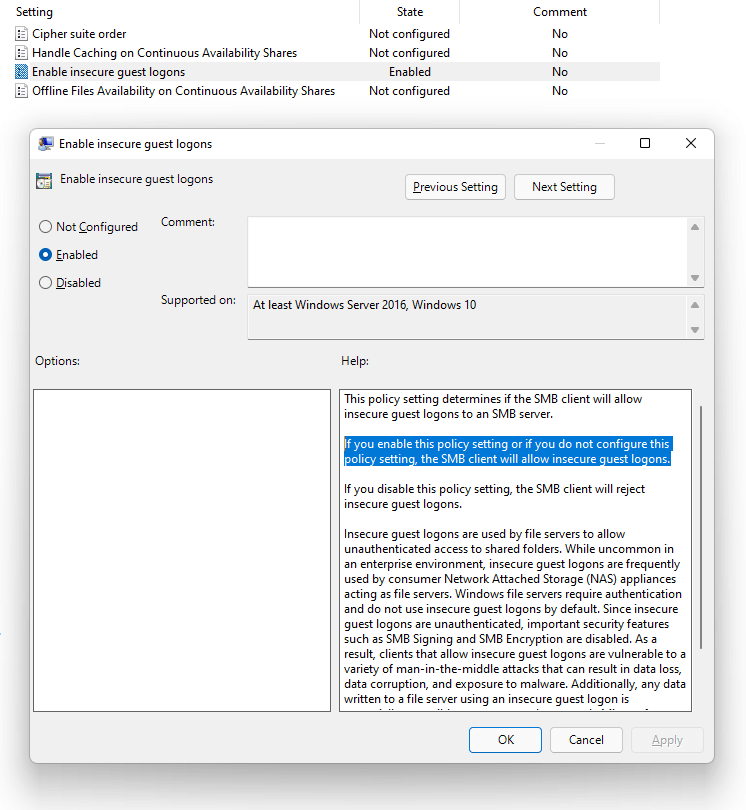
I tried a different solution which I found here. I left everything on the NAS unchanged. In the local group policy settings of my Windows PC, I enabled insecure guest logons for the SMB client. This allows the PC to connect to SAMBA shares which are not protected by a password (such as the Public folder on a QNAP NAS).
Note: The Group Policy Editor (gpedit.msc) is not available in all versions of Windows 10 and Windows 11. It is primarily included in the Professional, Enterprise, and Education editions of these operating systems. However, you can use a tool called ‘Policy Plus’ to add it to the home edition.
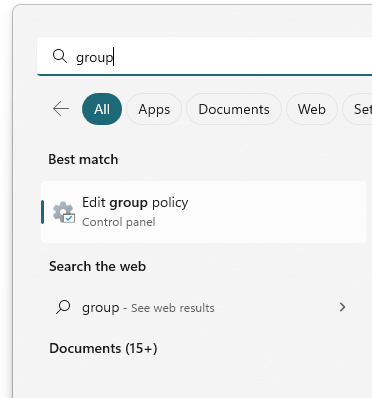
To start the Local Group Policy Editor, press your Windows key and start typing “group policy” (then select “Edit group policy”):
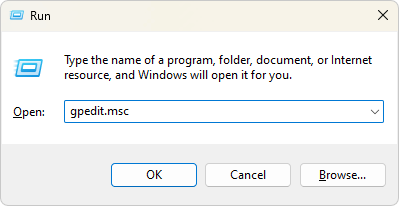
Alternatively, you can also press the Windows key and R, then type “gpedit.msc” and click on OK:
In the Local Group Policy Editor, the setting can be found under Local Computer Policy -> Computer Configuration -> Administrative Templates ->Network -> Lanman Workstation -> Enable insecure guest logons:
Note: The description says that “if you do not configure this policy setting, the SMB client will allow insecure guest logons.” This was not true for me on Windows 11 21H2, the setting had to be explicitly enabled. On other PCs running Windows 10, the described behavior was correct and the entire problem never appeared.
Now (and after the IP ban period has expired, of course) it was possible to access the NAS through the file explorer. Clicking on a protected folder brought up the Enter network credentials dialog:
Why did this work? Apparently, Windows only tried to use the current user credentials once when connecting to the NAS and then used guest access. As this resulted only in a single failed access attempt, the PC’s IP address was not banned.
Update February 15, 2023: A previous version of this article mentioned making changes to the registry, however the screenshot showed the Local Group Policy Editor (gpedit.msc) and not the registry editor (regedit.exe). Many thanks to Daniel for the comment.
Update March 28, 2023: Added a clarification that the Group Policy Editor (gpedit.msc) is only available on certain editions of Windows and changed the title accordingly.